
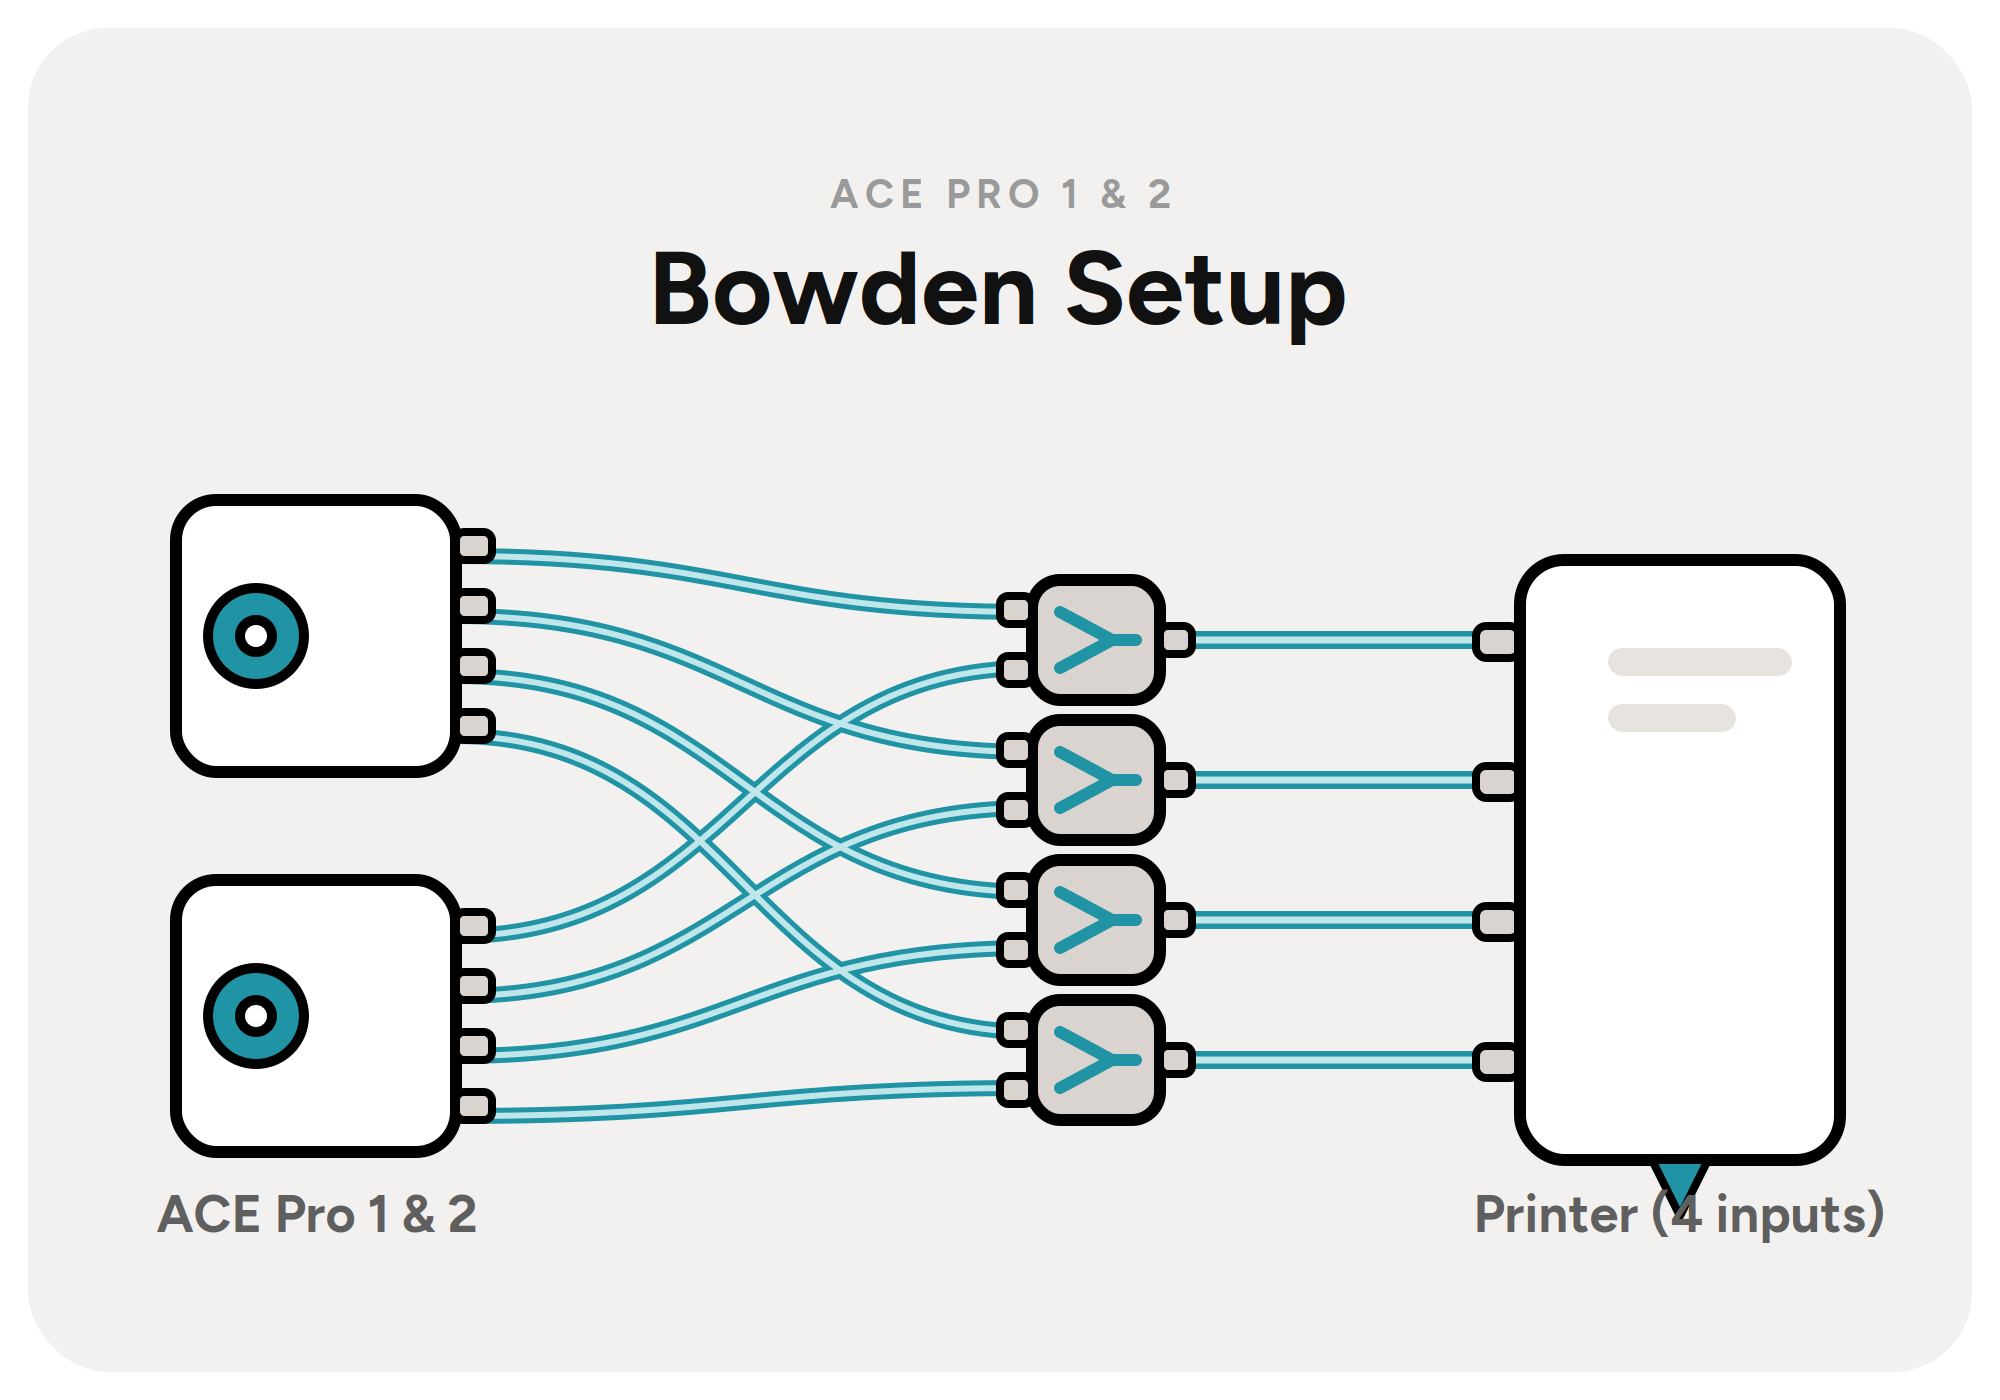
The Bowden setup depends on the mode configured in mUlt1ACE.
ACE per HEAD mode
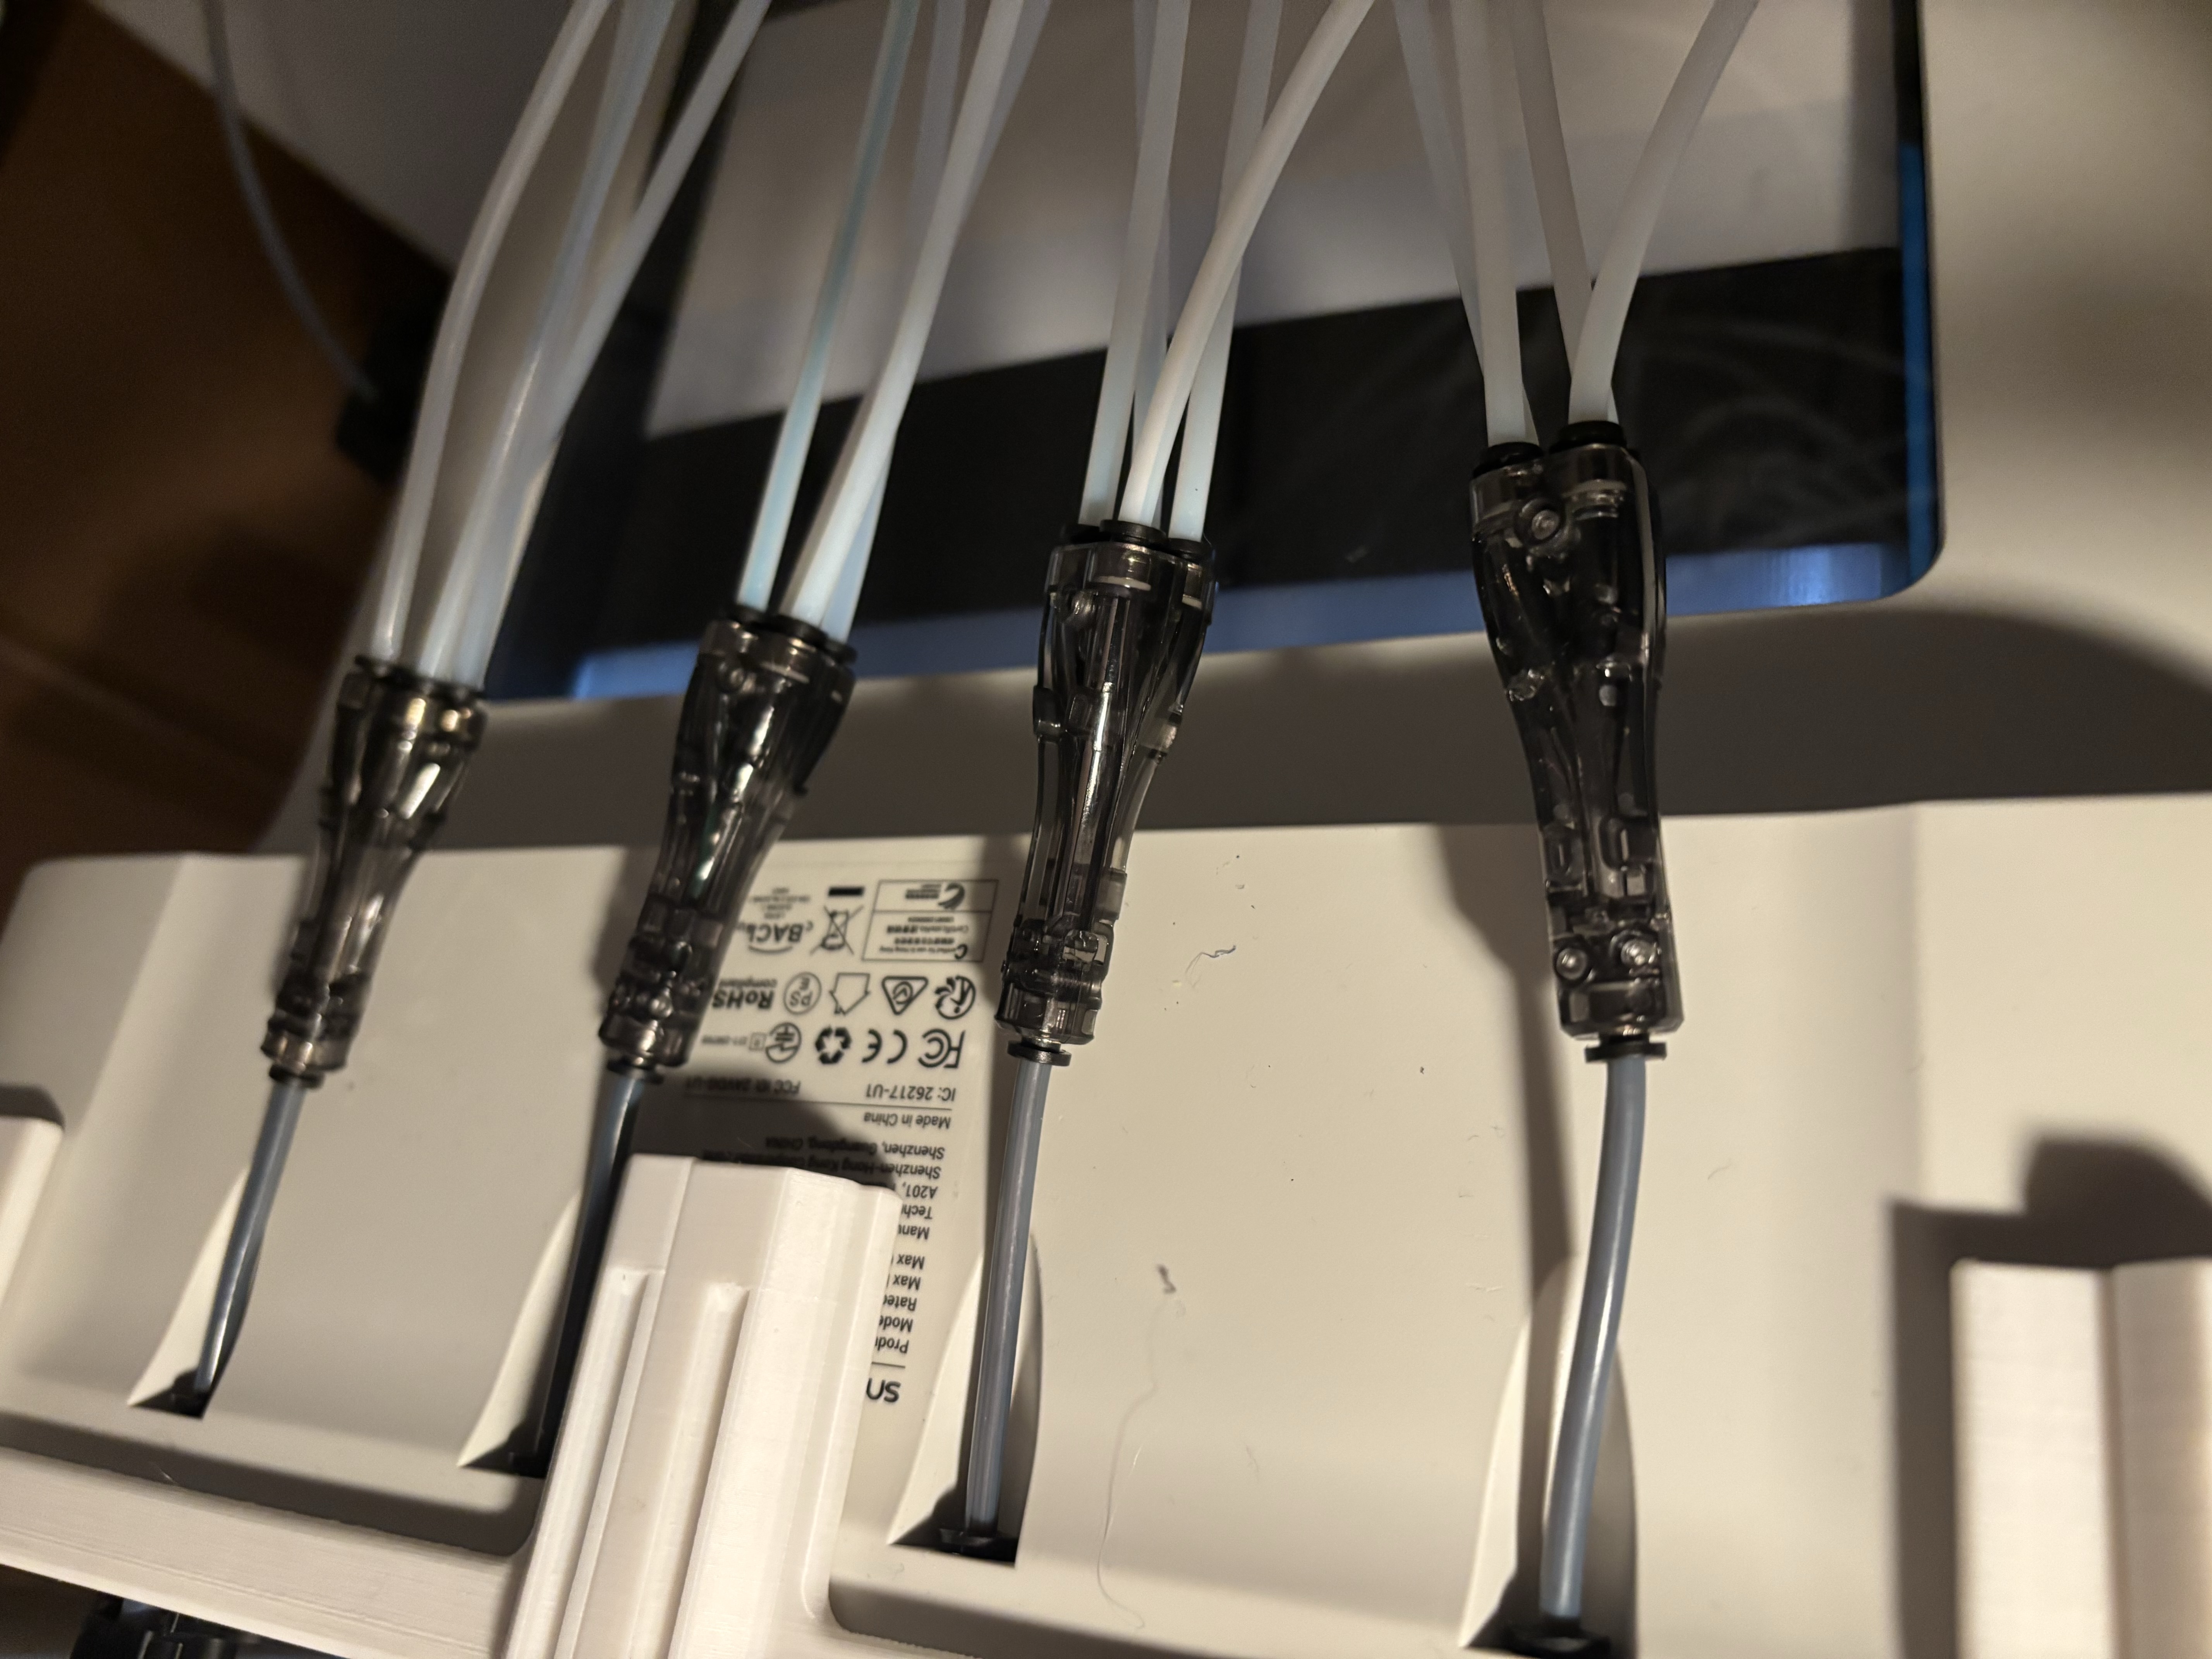
In the new ACE per HEAD mode, connect the 4 outputs of the ACE to a 4-in-1 combiner and plug it into the rear input of the assigned head, as shown in the photo. The remaining heads stay connected to the side feeders.
Classic Multi Mode
In the classic Multi Mode, proceed as follows: the Bowden tubes connect your ACE units to the rear inputs of the Snapmaker U1, exactly as shown in the title illustration above.
Connect slot 1 of every ACE Pro you use to HEAD 1, slot 2 to HEAD 2, and so on.
Recommended: use splitters
On an AMS you could connect everything directly, but I recommend using splitters, joined to the printer inputs with a short piece of Bowden tube.
I recommend this newer Bambu Lab model. I often had problems with the previous version.
Running fewer than 4 ACE units
With fewer than 4 ACE units you can route the original feeders through the same splitters, so you do not have to re-plug anything when switching back to normal mode.
Alternatively, plug a short open piece of PTFE tube into a free input, for example to print soft TPU in parallel. My TPU spool holder works well for this, and a dry box is handy for longer prints.
TPU spool holder on MakerWorld ↗
Removing the original spool holders
If you want to remove the original spool holders, I also have covers for the mounting holes on MakerWorld.