Want to support the project? You can grab the parts you need right here. They are also available from various online retailers if you prefer to source them yourself.
Universal ACE Cable Kit
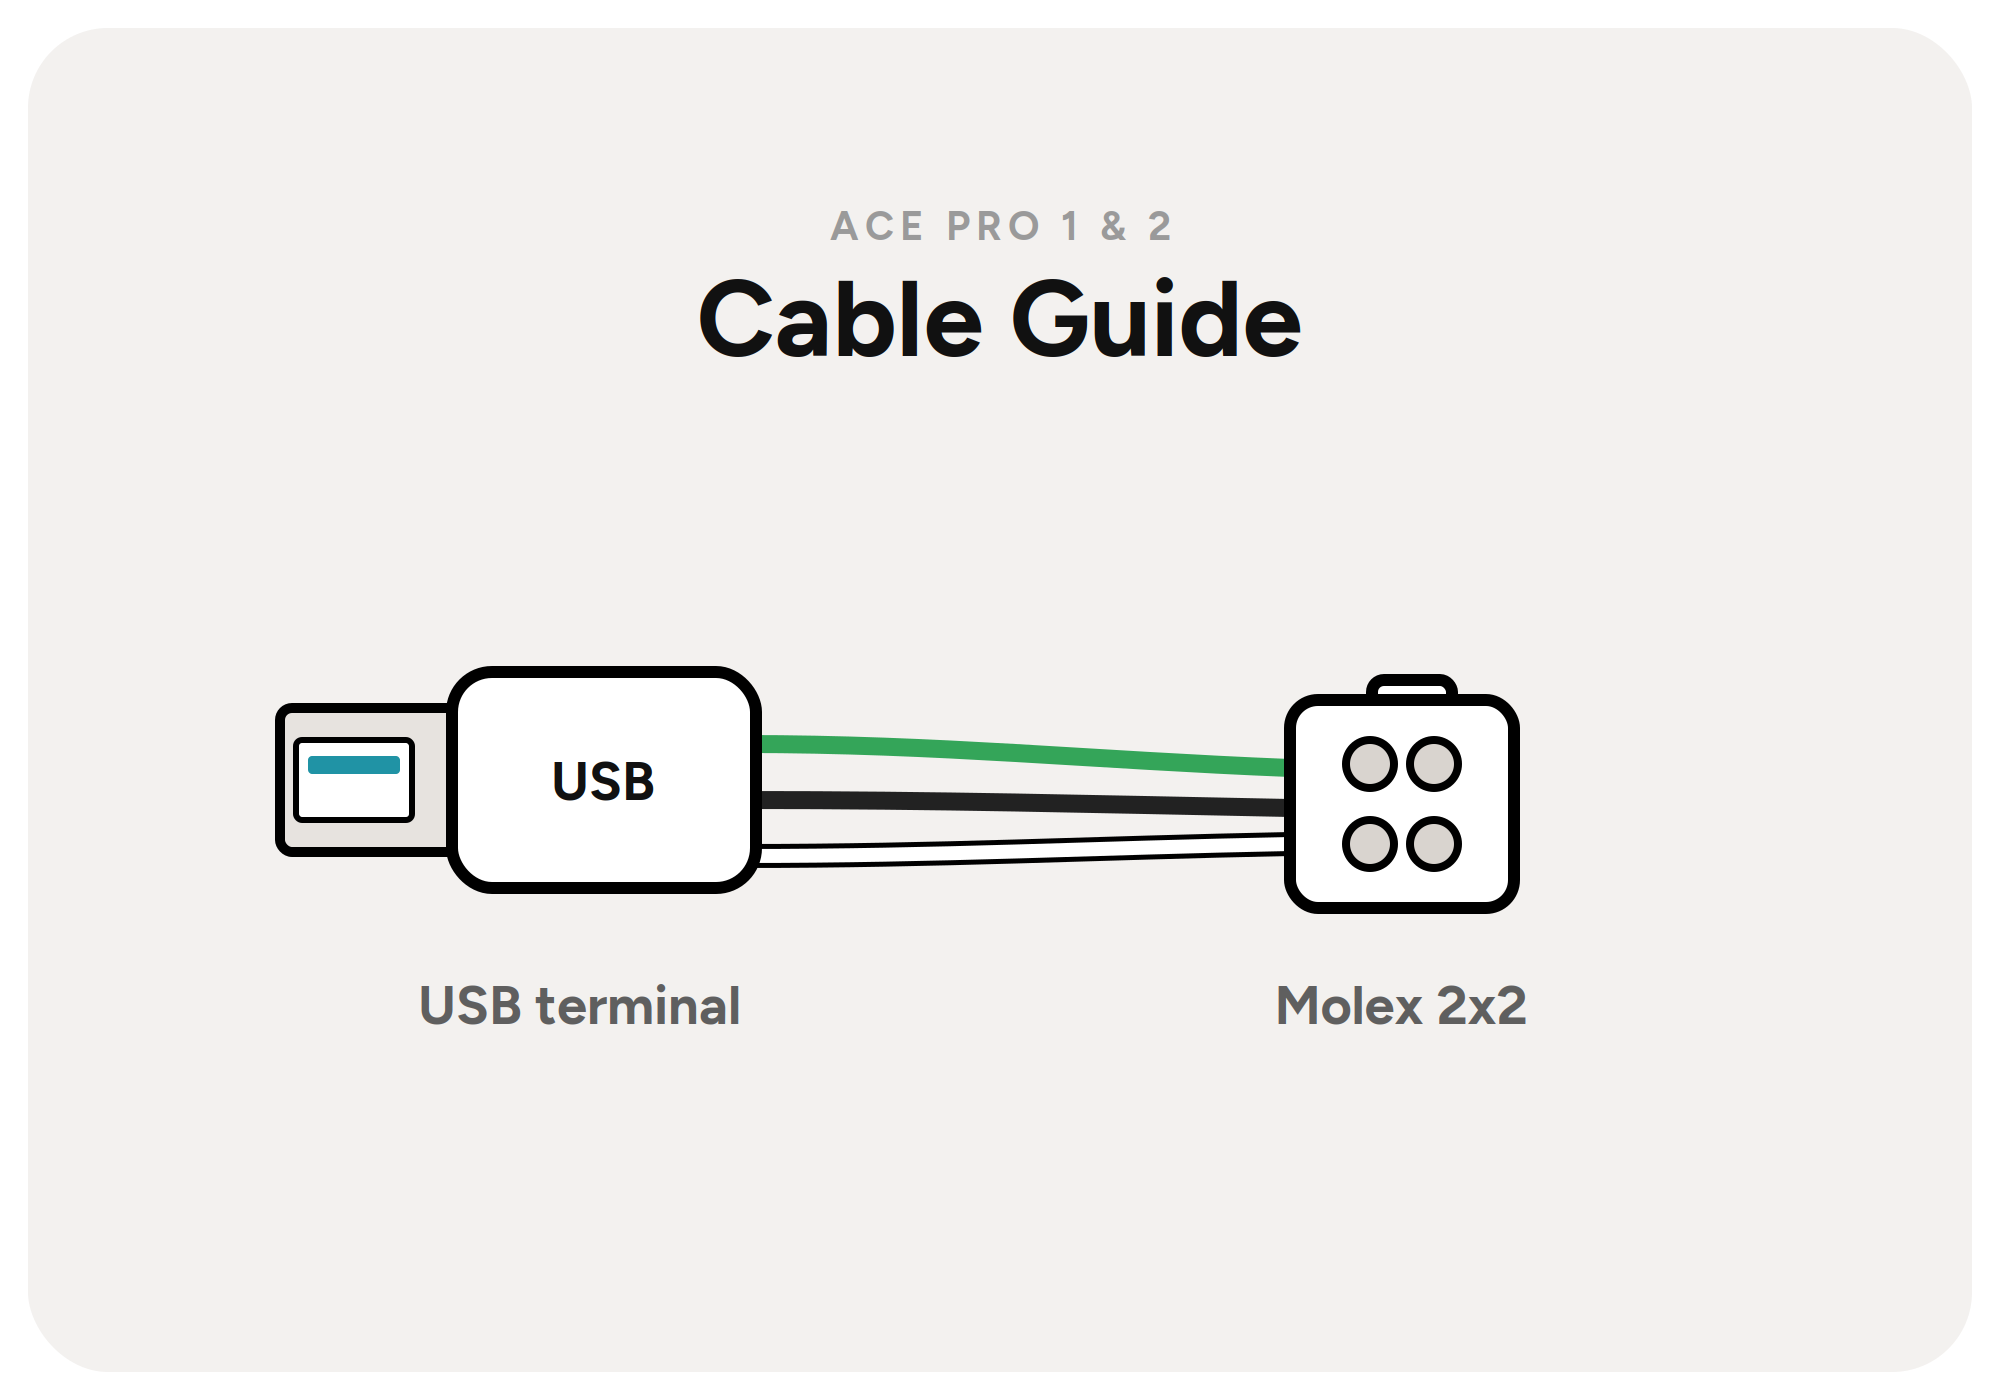
A universal wiring kit with a USB terminal and a Molex 2x2 connector. Works with both ACE Pro and ACE Pro 2.
- USB terminal + Molex 2x2
- Fits ACE Pro & ACE Pro 2
- Screws together, no soldering
Kit of parts, sourced in the EU. Shipped via Deutsche Post “Warenpost International”. If we can't ship to your destination, the order will be cancelled and fully refunded.
What you need
The same cable works for both ACE Pro 1 and ACE Pro 2. You only need a USB-to-Molex adapter:
- ACE Pro 1: plug the adapter onto the 4-pin end of the 6-to-4-pin connection cable.
- ACE Pro 2: plug it onto the 4-pin end of the K3 / K3M / S1 adapter cable.
- Then connect the adapter to the USB port of your Snapmaker U1.
Multiple units: Several ACE Pro 1 units are daisy-chained using the included connection cables. For several ACE Pro 2 units you need one cable per unit, plus an additional USB hub.
-
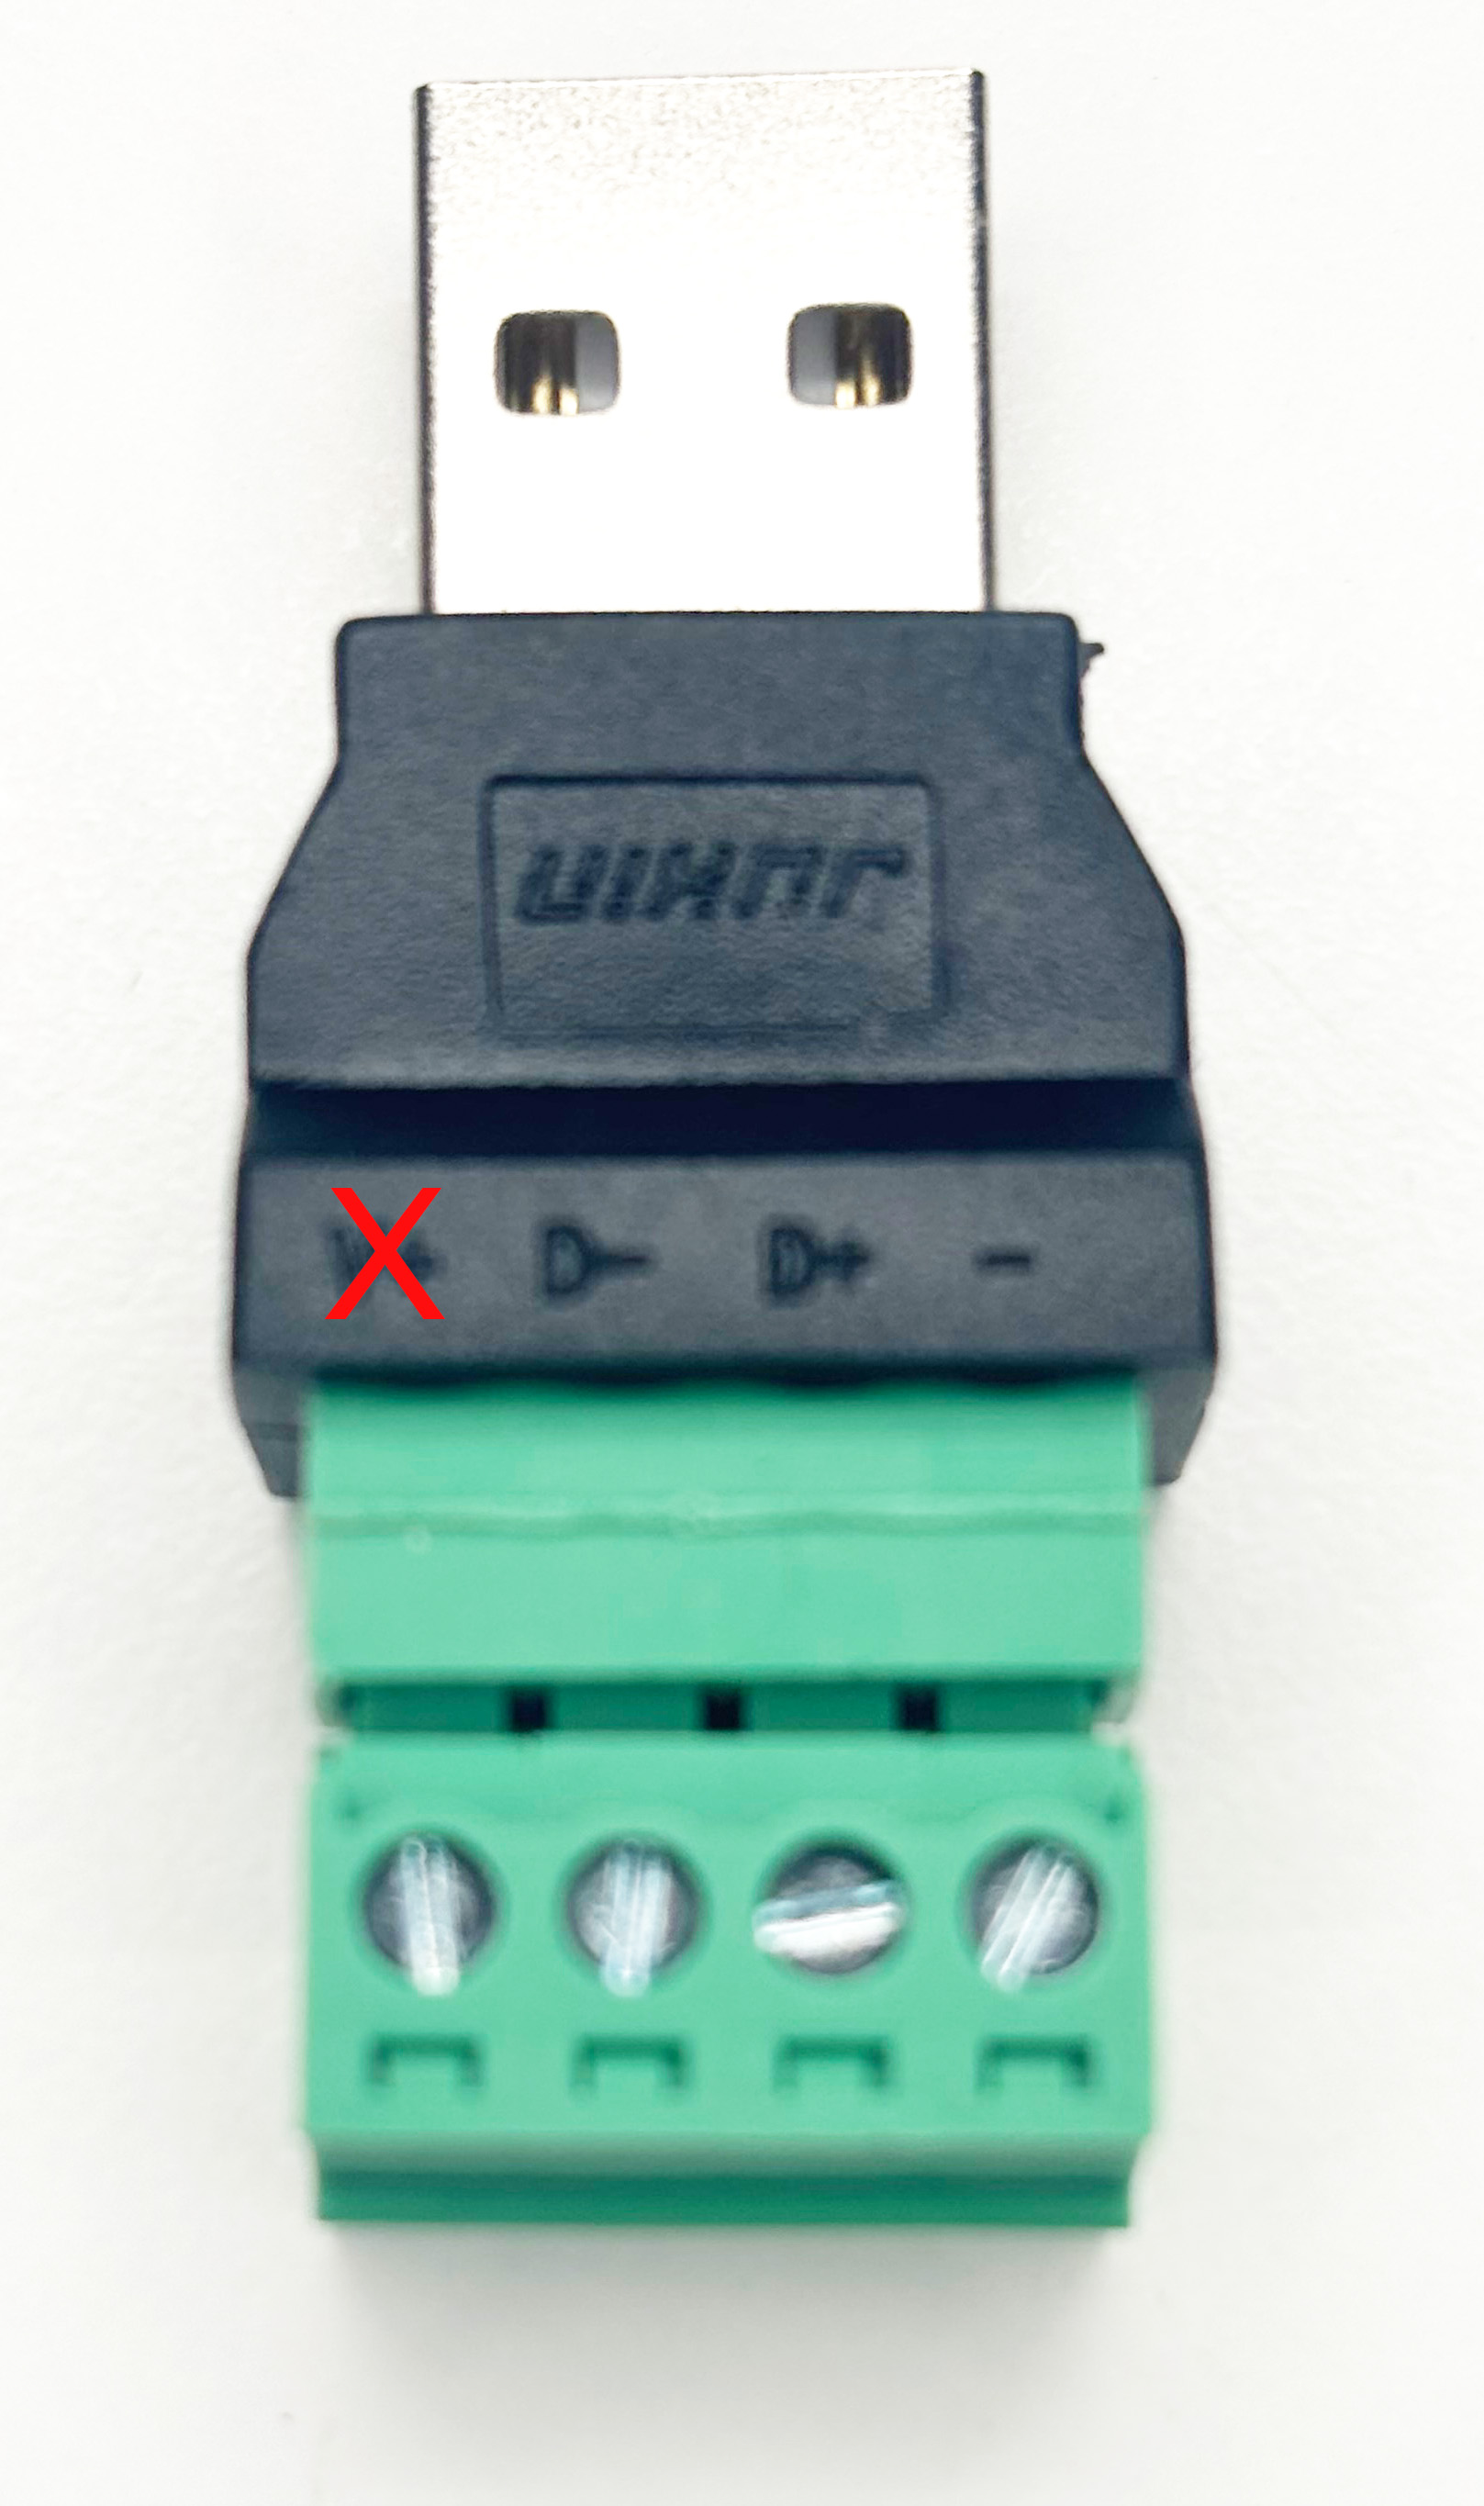
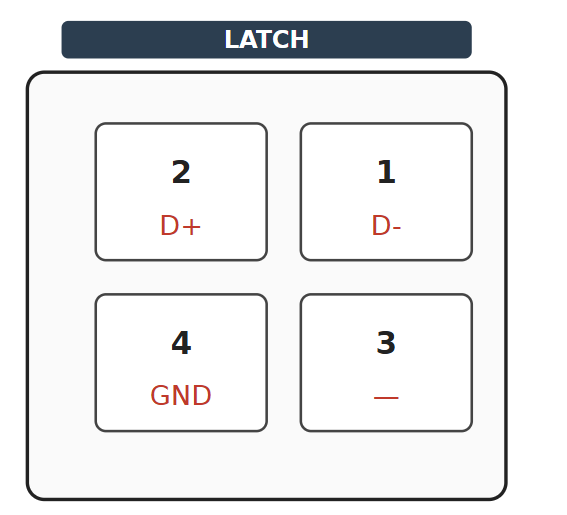
1Identify the USB terminal contacts
The contacts on the USB terminal cable are labeled directly. You need -, D- and D+.
-
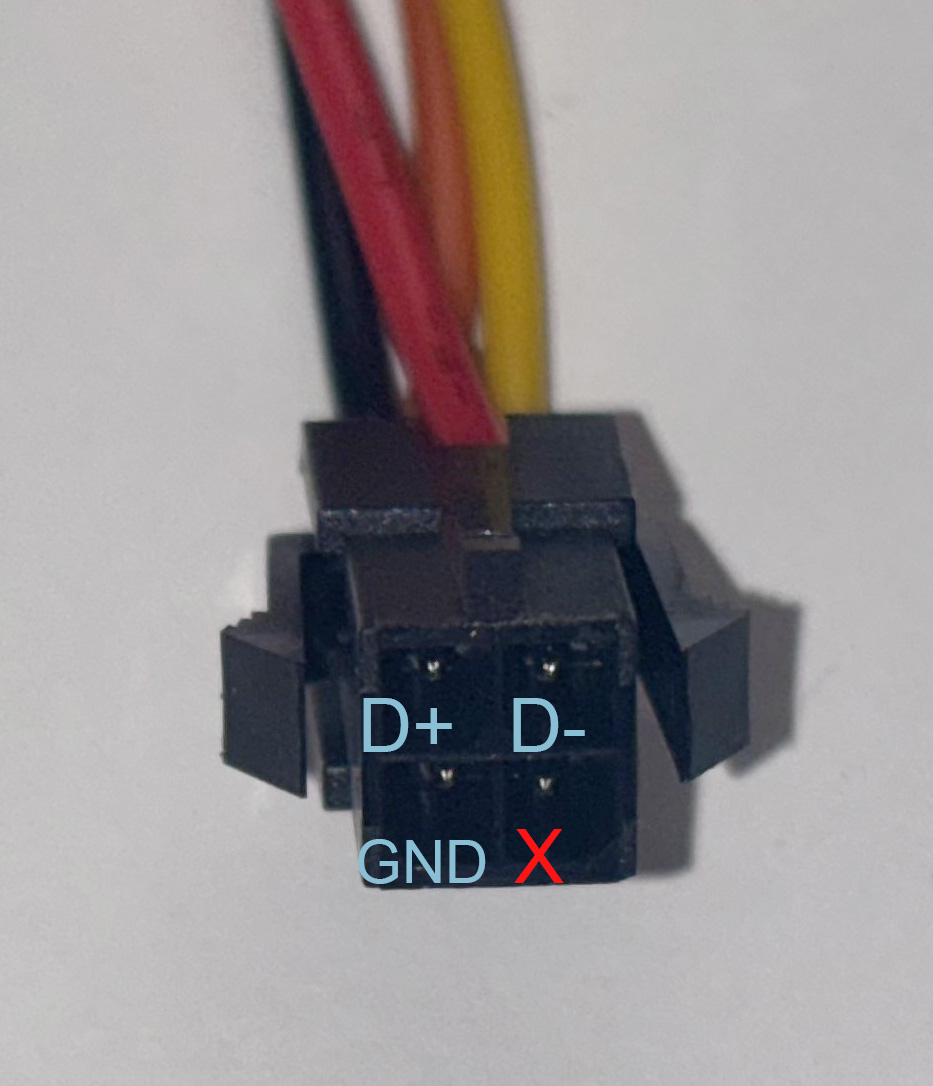
2Wire the Molex connector
Screw the Molex cable to the USB adapter following the pin scheme below. Tip: twist the wires that go to D- and D+ together.
Keep the wires as short as possible. If you can, trim them and strip the ends to length before connecting.Never wire VCC (pin 3). Connecting it can damage your hardware.
-
3Connect it to the printer
Plug the cable onto the 4-pin end of the matching connection cable and connect it to the USB port of your Snapmaker U1.
-
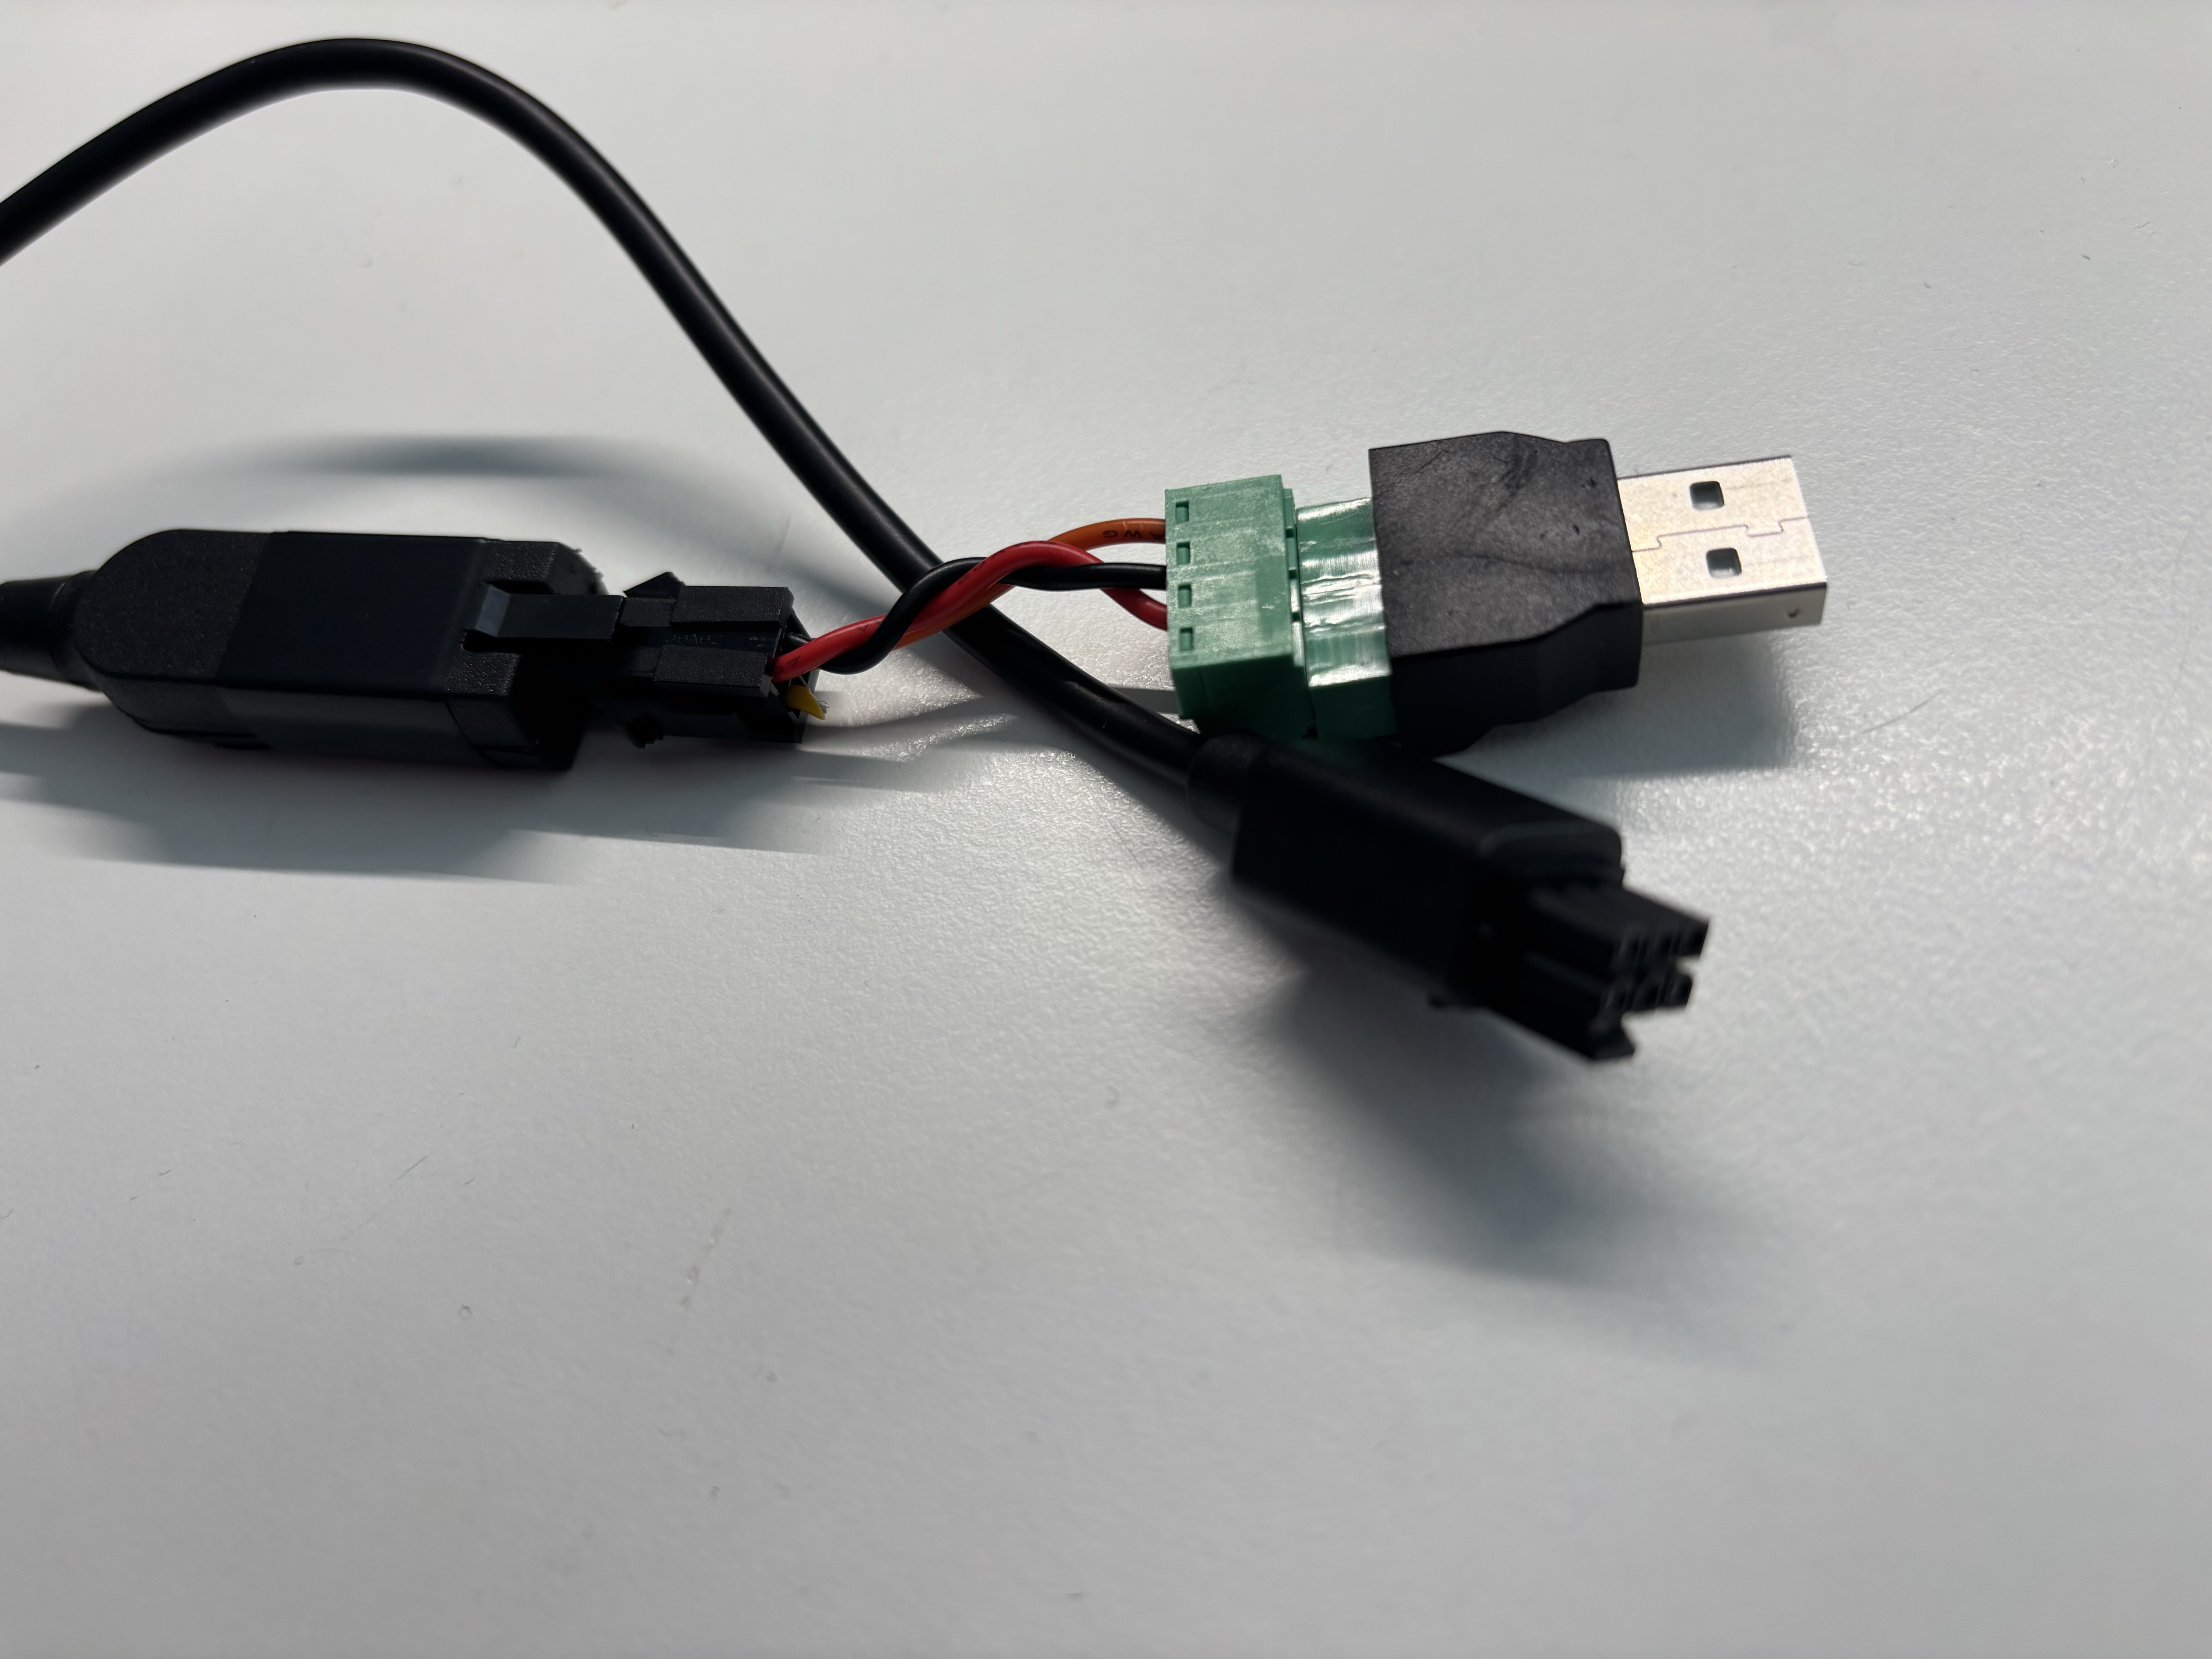
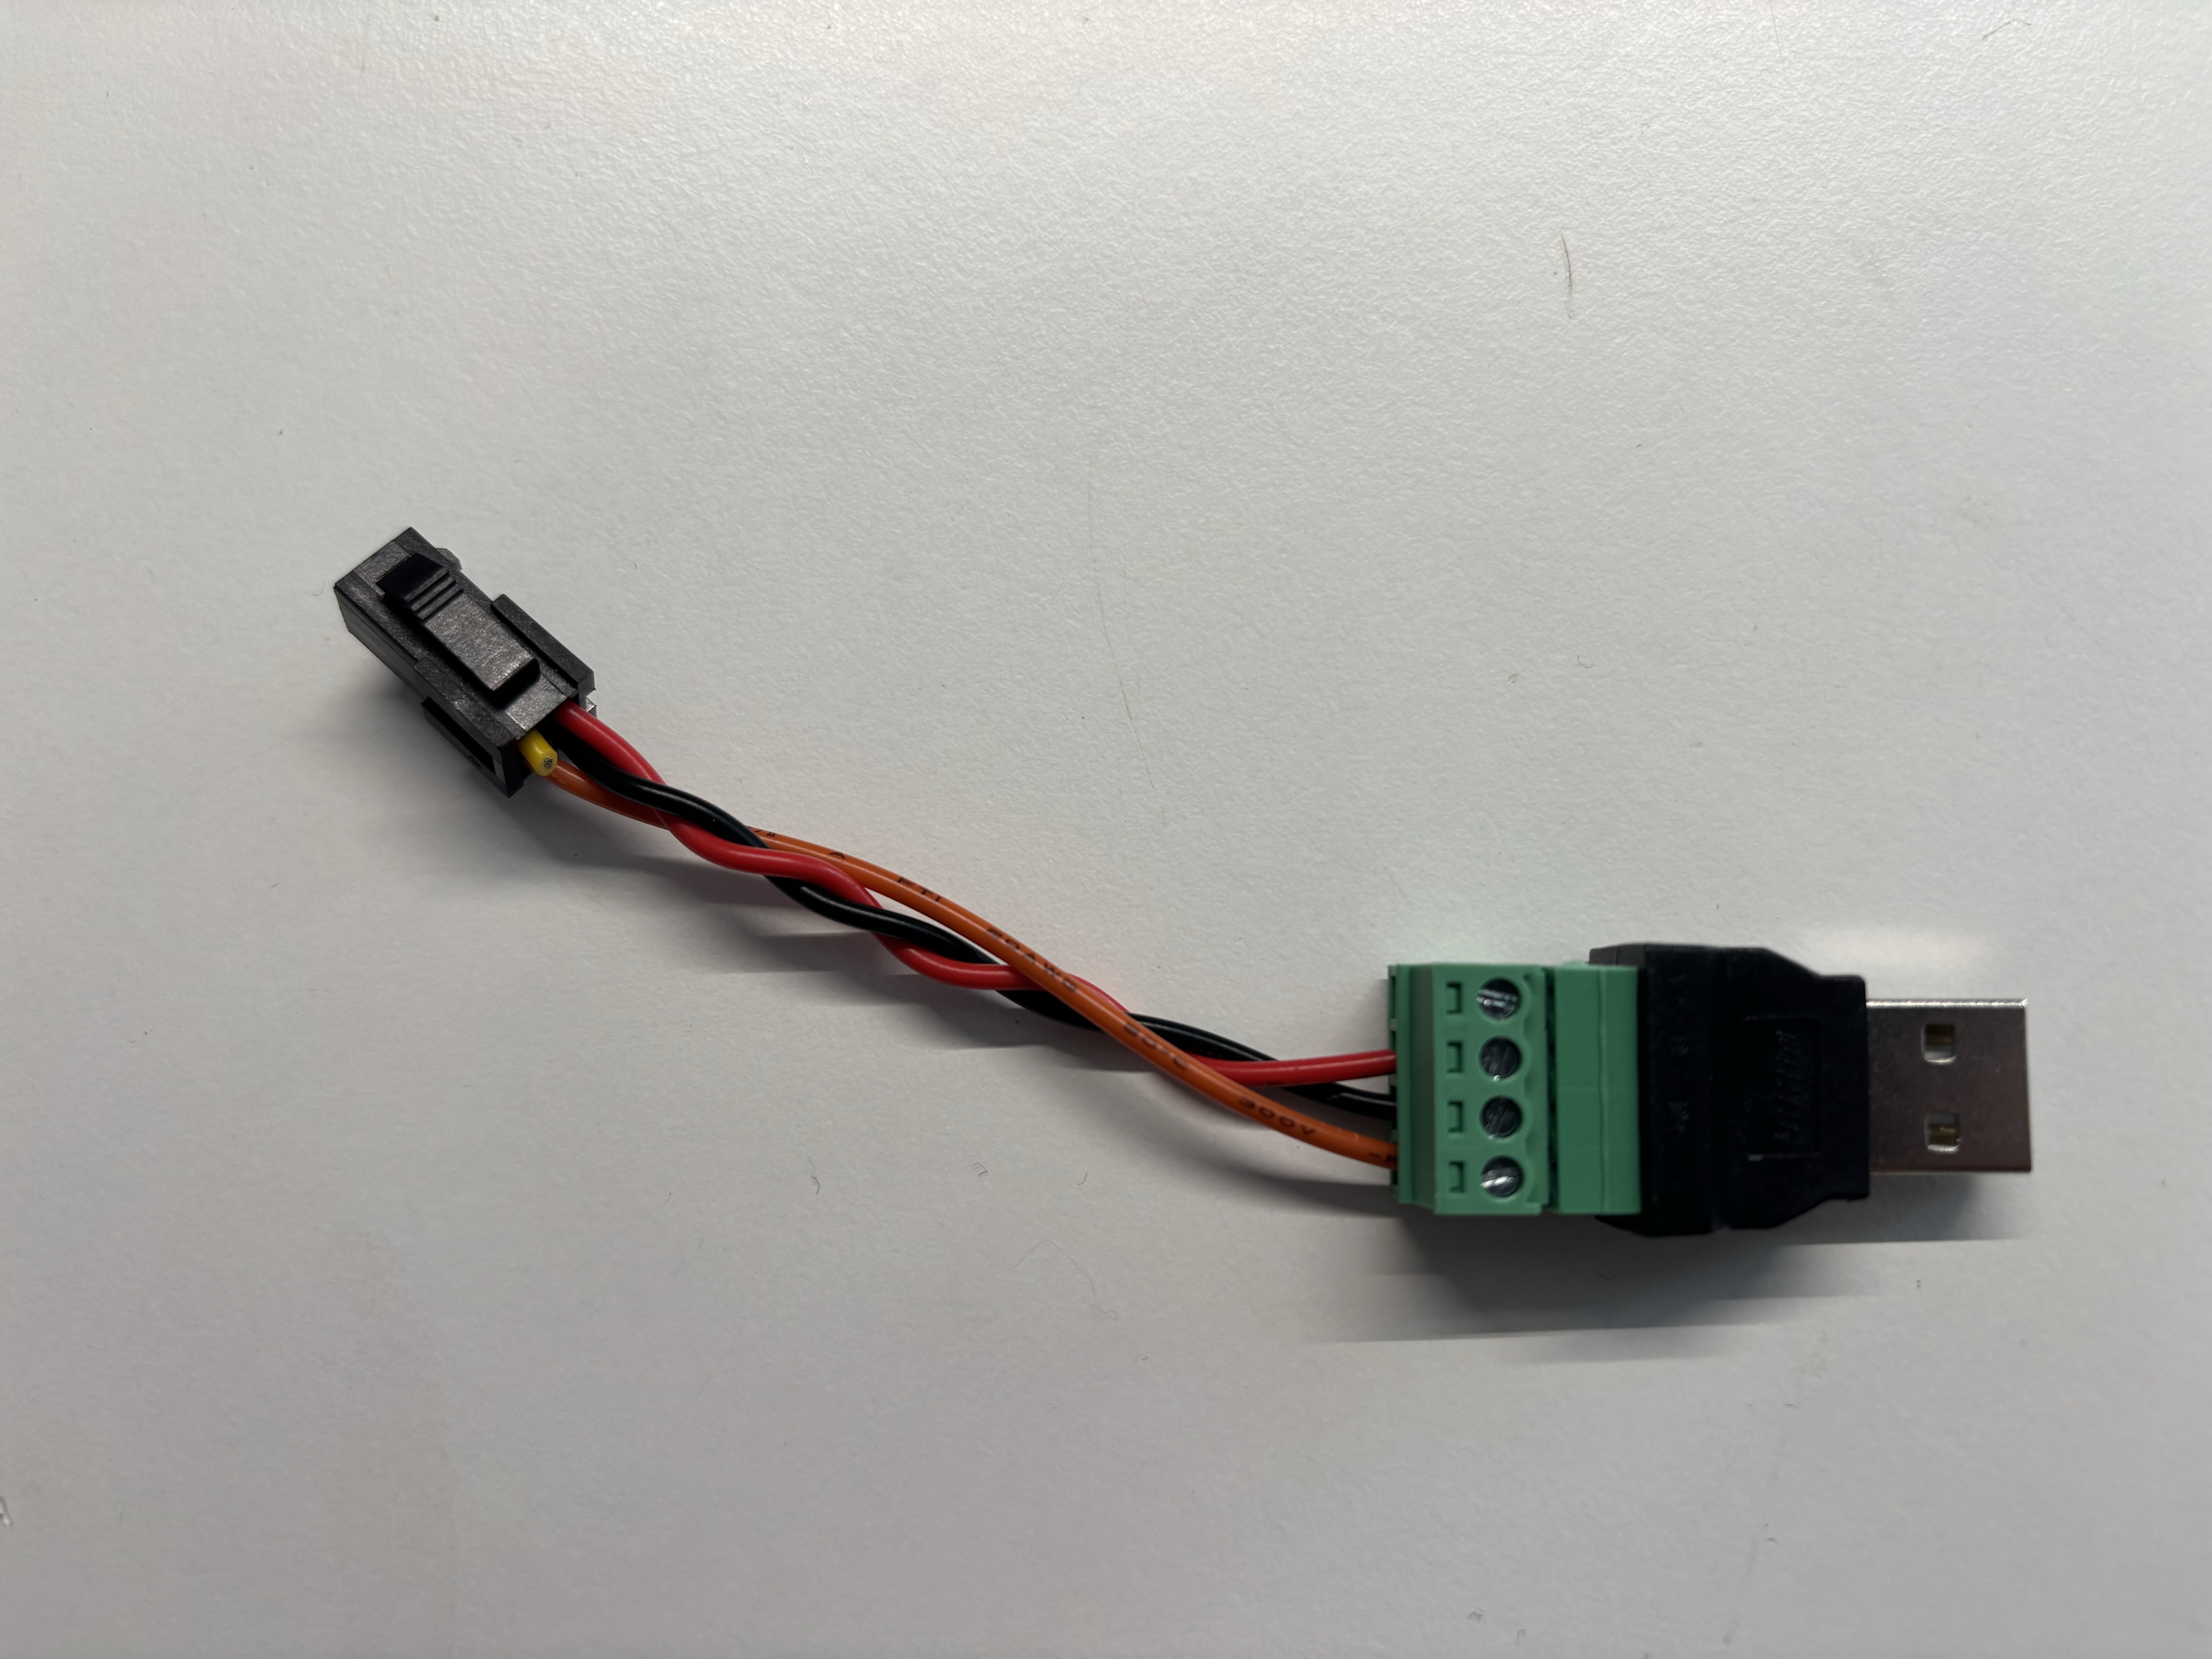
4Assembled (example: ACE Pro 2)
Here is what the finished, assembled cable looks like, wired up for an ACE Pro 2.